How to Wear Puncture Resistant Insoles in Regular Shoes?

Time:2026-09-24 Author:Amelia
0%

Can you wear puncture resistant insoles in regular shoes? Often, yes—but fit matters as much as the label. A thick insert can lift your heel, crowd your toes, or make a familiar sneaker feel unstable. Picture a hard plate beneath the ball of your foot: it may help block sharp objects, but it can also change how the shoe flexes.

Industry standards offer useful context. ISO 20344 describes test methods used to assess protective footwear, including resistance to penetration. Safety footwear requirements in ISO 20345 include puncture-resistance classifications and specified test forces. Those results apply to tested footwear configurations; they do not automatically certify an ordinary shoe after an insert is added. That distinction is easy to miss.

Before wearing an insert, check its size, shape, and intended use. Remove the shoe’s original sockliner only if the insert maker recommends it. Then check that your toes still move freely and your heel stays seated. Walk on a clean floor first. Notice pressure, slipping, or a raised heel. Small details matter.

I cannot verify a direct quotation from a named industry expert on this exact question, so I will not invent one. That restraint matters: product claims and test results should be traceable to the manufacturer or a recognized standard. Also, an insert alone may not provide the same protection as certified safety footwear. Check the shoe and insert instructions, and reconsider the setup if it feels cramped or changes your stride.
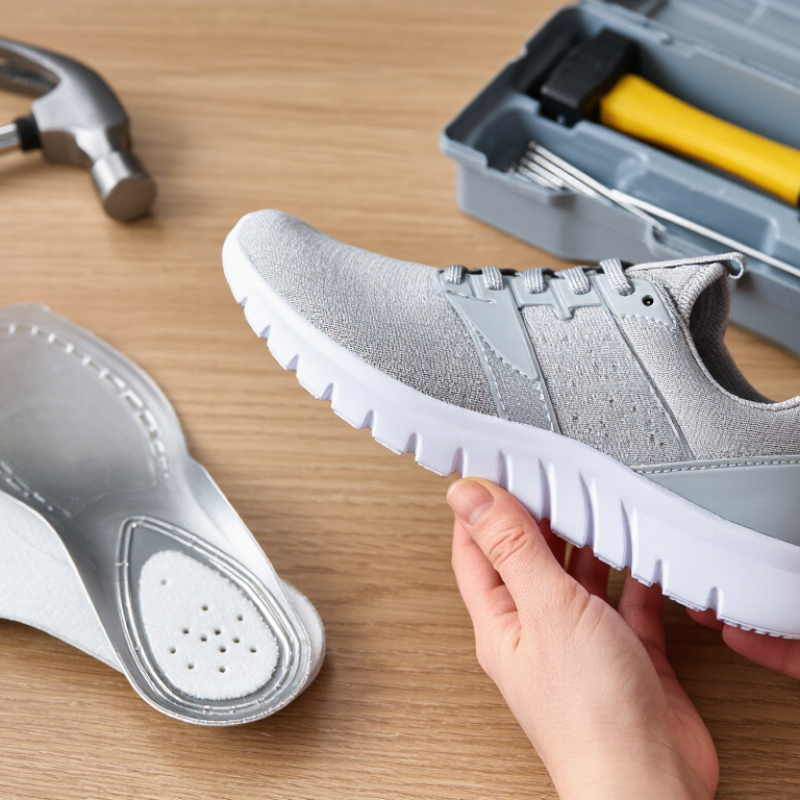
How to Wear Puncture Resistant Insoles in Regular Shoes?

Identify Shoe Compatibility and Check the ASTM F2413 Puncture-Resistance Rating

Before placing a puncture-resistant insole in a regular shoe, check the shoe’s usable interior space. Remove its footbed and compare the replacement’s length, width, and shape. The plate should lie flat, cover the forefoot, and avoid curling at the edges. Try the shoe on with work socks. Your toes should still move, and the heel should not lift. A tight fit can create pressure points; trimming a plate may weaken its protection, so follow its instructions.

Your toes should still move, and the heel should not lift.

Check the exact rating, not just the phrase “puncture resistant.” ASTM F2413 sets performance requirements for protective footwear, while puncture resistance is evaluated through ASTM F2412 testing. In this system, PR footwear is tested against a force of 1,200 newtons, about 270 pounds-force. That rating applies to footwear tested as an assembly; it does not automatically certify a separate aftermarket insole. Ask for the product’s test documentation and confirm what configuration was tested.

Small distinction. It matters.

Also inspect the shoe’s construction and intended use.

A soft, worn sole may not hold an insert securely, even when the plate itself meets a test threshold. OSHA identifies punctures among workplace foot hazards, but no insert makes every shoe suitable for every job. If your workplace requires certified protective footwear, check its requirements before relying on a regular shoe and separate insert. A few minutes checking fit and documentation can prevent misplaced confidence.

Select an Insole That Matches the Shoe’s Shape and Protective Coverage

Puncture-resistant insoles can fit regular shoes, but shape comes first. A safety layer that is too wide may buckle under the arch. One that is too short can leave the forefoot exposed. Match the insole outline to the shoe’s footbed, not just your usual size. Remove the original liner when possible. Then compare heel width, arch position, and toe length.

Protective coverage also matters. Some insoles shield the full sole, while others protect only the heel and forefoot. For workshop floors, outdoor repairs, or scattered sharp debris, full-length coverage is usually more practical. Check the stated protection area and construction instructions before wearing them. Do not assume a thick insole covers every contact point. It may not. The shoe must also hold the insole flat, without wrinkles or lifted edges. Walk slowly indoors and check pressure near the toes, heel, and arch.

I have learned this through fitting tests: comfort can hide a poor match. My early mistake was choosing a rigid insert by size alone. It fitted the length, but crowded my toes and changed my heel position. A better method is to trace the shoe’s footbed, compare it with the insole, and test both with work socks. Leave enough room for natural movement. If the shoe feels tight after ten minutes, reconsider the shape or coverage.

Remove the Original Footbed and Trim the New Insole to Fit

Take out the shoe’s original footbed before fitting a puncture-resistant insole. It may lift out easily, or it may be lightly attached; avoid pulling hard if it resists. Check the shoe’s interior for grit, nails, or folded lining, then compare the new insole with the removed footbed. The old footbed gives you a useful outline. Keep the heel edges aligned, and note where the toe shape differs.

Trim slowly. Use sharp scissors and remove a narrow strip from the toe end, following the outline rather than cutting a large curve at once. Some insoles contain a protective layer that should not be cut, so read the fitting instructions before trimming. If the design allows trimming, stay within its marked lines. Refit it after each small cut. It should lie flat without buckling or curling at the sides. Nearly there? Walk around indoors for a few minutes. Check for pressure under the arch, a raised heel, or toes pushed forward. A snug fit matters, but discomfort is not something to ignore. I’ve found that rushing the last cut is easy to regret. If the insole still shifts or feels uneven, remove it and check the shoe’s shape again.

Insert the Insole Flat, Then Check for Gaps, Edges, and Heel Lift

How to Wear Puncture Resistant Insoles in Regular Shoes?

Wearing puncture-resistant insoles in regular shoes starts with fit, not force. Remove the existing insole if it is removable, then clean the shoe interior. Place the protective insole with the smooth side facing your sock, unless its instructions state otherwise. Slide the toe forward gently, then press the heel down. Keep it flat. A folded edge can create pressure under your arch and reduce comfort during long walks. Compare the insole outline with the shoe bed. It should sit inside the shoe walls without buckling. If trimming is allowed, follow the cutting guide and remove small amounts only. Do not cut through protective layers casually.

Check for gaps along both sides and beneath the toe area. Use your fingers to press around the perimeter. No raised edges should catch on socks or rub your foot. Stand, walk, and climb a few steps before wearing the shoes for work. Watch for heel lift, sliding, or a clicking feeling. These signs may indicate a loose fit or insufficient room. I once skipped this walk test and noticed rubbing after several hours. That was avoidable. A thicker insole can also lift the heel and change the shoe’s fit, especially in low-cut footwear. If your toes feel crowded, stop and reassess instead of forcing the shoe closed. Replace worn insoles when their shape changes. For uncertain fit, consult a qualified footwear professional and follow the care instructions.

Test the Fit While Walking and Replace the Insole if Protection Is Damaged

Puncture-resistant insoles can make regular shoes feel tighter, so check the fit before relying on them for a full shift. Remove the original footbed if the new insole is designed to replace it, then place the protective layer flat inside the shoe. Check that it reaches the toe area without curling or buckling. A raised edge can rub your foot.

Walk indoors for several minutes. Try a hard floor, a carpet, and a few stairs. Notice whether your heel lifts, your toes feel cramped, or the insole slides when you turn. Stop and adjust the fit if anything pinches. A short test helps, but it cannot predict every discomfort after hours on your feet. I have found that socks can change the feel more than expected.

Inspect the insole regularly, especially after wet or demanding work. Look for cuts, cracks, deep creases, separated layers, or a shifted protective insert. If protection appears damaged, replace the insole rather than covering the spot or continuing to wear it. Don’t guess. If the insole’s condition is unclear, follow its care instructions or ask a qualified safety professional. A worn surface may still look usable, but appearance alone cannot confirm that its protective layer remains effective.

How to Wear Puncture-Resistant Insoles in Regular Shoes

How to use this guide: Follow the steps in order. Make sure the insole lies flat and fits the shoe without bunching or lifting your heel. Walk carefully to check comfort and stability. Inspect the insole regularly, and replace it if the protective layer is damaged. An insole does not make a shoe puncture-proof.

FAQS

Can a puncture-resistant insole fit inside a regular shoe?

Often, yes. Remove the original footbed and compare length, width, and shape. The insert should lie flat without curling.

How can I check whether the shoe has enough space?

Wear work socks during the fitting. Your toes should move freely, and your heel should not lift. Tightness creates pressure points.

Should I trim an oversized protective insole?

Be careful. Trimming may weaken its protection. Follow the product instructions instead of cutting by guesswork.

Does “puncture resistant” prove the insole meets a safety rating?

No. Check the exact test documentation. A separate insole is not automatically certified because protective footwear passed testing.

What do ASTM F2413 and ASTM F2412 mean here?

ASTM F2413 sets performance requirements for protective footwear. ASTM F2412 includes testing methods, including puncture resistance.

What force is used for the puncture-resistance test?

PR footwear is tested against 1,200 newtons, about 270 pounds-force. The result applies to the tested footwear assembly.

Is a full-length insole better for sharp debris?

Usually, full-length coverage is more practical. Partial coverage may leave areas exposed near the arch or forefoot.

How do I match the insole to my shoe’s shape?

Compare the heel width, arch position, and toe length. Tracing the footbed can help. Size alone is not enough.

What should I check after walking in the shoes?

Walk slowly indoors and inspect your toes, heel, and arch. Look for wrinkles, lifted edges, or pressure. Comfort can hide a poor match.

Can any regular shoe become suitable for hazardous work?

No. A soft, worn sole may not secure the insert. Workplace requirements may call for certified protective footwear, not a separate insert.

Conclusion

Can you wear puncture resistant insoles in regular shoes? In many cases, yes, but the shoes must have enough room, a stable sole, and a shape that allows the insole to sit flat without restricting movement. Start by checking whether the footwear is compatible with the insole and reviewing its ASTM F2413 puncture-resistance rating. Choose a model that matches the shoe’s length, width, arch shape, and intended coverage area.

Remove the original footbed before installation, then trim the replacement insole carefully along the provided outline if needed. Insert it fully and check for gaps, raised edges, or heel lift, as these issues can reduce comfort and stability. Walk on a safe, level surface to test the fit, paying attention to pressure points and slipping. If the protective layer becomes cracked, bent, or otherwise damaged, replace the insole rather than continuing to use it.

Amelia

Amelia

Amelia is a seasoned marketing professional with a wealth of expertise in our company’s core offerings. With an unwavering passion for driving growth and innovation, she plays a pivotal role in shaping our marketing strategies and enhancing brand visibility. A key aspect of her responsibilities......