How to Make Work Boots Waterproof

Time:2026-11-01 Author:Charlotte
0%

Wet work boots can soak through at the seams, around the eyelets, or across worn leather. Cold, damp socks are uncomfortable, and moisture can shorten a boot’s useful life. Learning how to make work boots waterproof starts with identifying the boot material and checking its care label. Leather, suede, and synthetic uppers may need different products. One treatment does not suit every pair.

This guide explains how to clean boots, let them dry fully, and choose a compatible wax, cream, or spray. It also covers seams and tongue areas, where water can slip inside during a long shift. Use a small amount of product first, then follow the manufacturer’s directions. A soft cloth, a dry brush, and a ventilated place to work are often enough to begin. No special workshop needed.

Check the fit, too. A boot that bends sharply at a worn crease may need repair, not another layer of treatment. Waterproofing products can change leather’s color or feel, so test an unseen spot and allow it to dry before treating the whole boot. Then inspect the result with a light splash of water, rather than assuming the job worked. Even careful care has limits. Heavy rain, damaged seams, and prolonged standing in water can defeat many treatments. Boots need time to dry between shifts, and that part is easy to overlook.
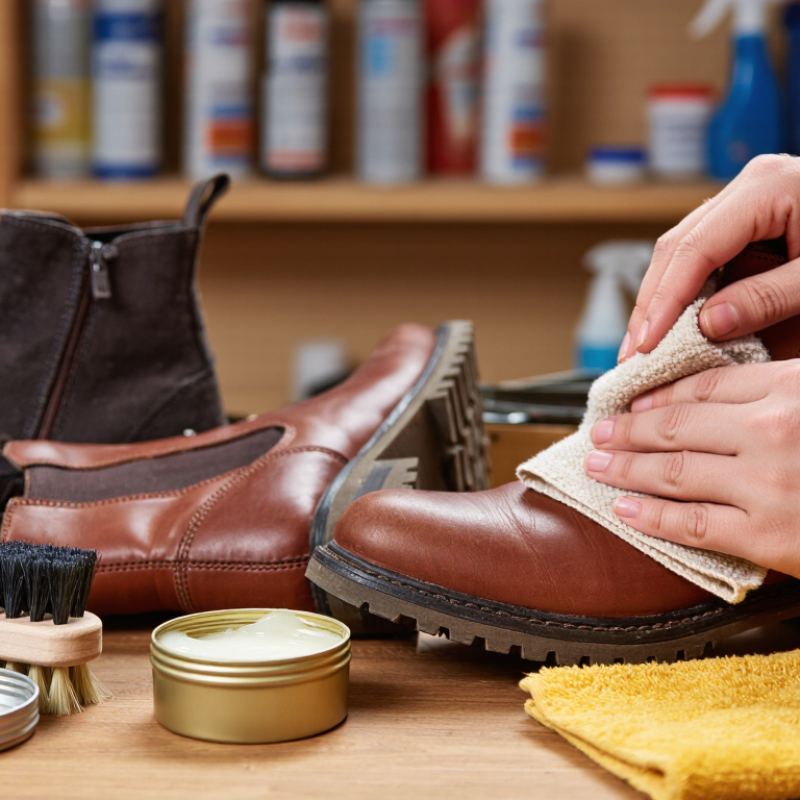
How to Make Work Boots Waterproof

Separate Waterproofing from ASTM F2413’s 75 ft·lbf Toe-Impact Rating

How to Make Work Boots Waterproof

Separate Waterproofing from ASTM F2413’s 75 ft·lbf Toe-Impact Rating

Waterproofing and toe-impact protection solve different problems. ASTM F2413’s 75 ft·lbf impact rating concerns protective-toe performance under specified laboratory testing; it does not certify a boot against water. Keep the distinction clear. A boot can shed rain yet lack a rated toe, while a rated safety toe may sit in a boot that leaks at the seams.

To improve water resistance, brush away dried grit, wipe the upper, and let boots dry at room temperature. Check the stitching, eyelets, tongue gusset, and sole-to-upper seam; these spots can reveal leaks. Apply a treatment compatible with the leather or textile, following the care instructions. Test a small hidden area. Too much wax or spray can darken leather or affect breathability, and some treatments may not suit membrane-lined footwear.

If toe protection matters, check the boot’s marking and product documentation for ASTM F2413 and the stated impact class. Don’t judge by a thick-looking cap. The 75 ft·lbf figure is a test rating, not a promise that every impact is harmless. Reapply waterproofing when water stops beading, rather than on a fixed schedule. Damp socks can also come from sweat, not leaks—a detail that’s easy to overlook.

Identify the Boot Material Before Selecting a Waterproofing Treatment

How to Make Work Boots Waterproof
Identify the Boot Material Before Selecting a Waterproofing Treatment

Work boots can look alike but need different care. Check the tongue label or care instructions before applying anything. Smooth, finished leather can often take a leather conditioner or wax-based treatment. Suede and nubuck have a raised, fuzzy surface; heavy wax may darken them or flatten the nap. Textile panels need a treatment made for fabric, not an oily leather product. Guessing is easy. It can also leave permanent marks.

Look closely at the whole boot, not just the toe. Some pairs combine leather, mesh, and a waterproof membrane, so one treatment may not suit every panel. A built-in membrane can block water, but worn seams or damaged lining may still let moisture in. Brush away dirt, let the boots dry fully, and test the treatment on a hidden spot. Wait for the color and texture to settle before coating the rest. Labels can be vague, so a small test is worth the extra time.

Tips: Match the treatment to the main outer material, and follow its application directions. Use a light, even coat rather than soaking the leather or fabric. Keep the boot’s seams and tongue area in mind, where water often finds a path inside. Let treated boots dry naturally, away from heaters. Reapply when water stops beading, but don’t assume any treatment makes damaged boots waterproof.

How to Make Work Boots Waterproof

Identify the boot material before selecting a waterproofing treatment.

Relative suitability guide (1 = poor fit, 5 = good fit), not laboratory test results. Wax-based products are generally suited to smooth leather, while material-specific sprays are often a better choice for suede, nubuck, and textiles. Check the boot maker’s care instructions and the treatment label before applying.

Clean Boots and Let Them Dry Before Applying Any Product

How to Make Work Boots Waterproof

Waterproofing work boots starts with careful cleaning. Mud and grit can keep a treatment from reaching the leather or fabric evenly. Remove the laces, then brush the uppers, tongue, seams, and welt with a soft brush. Wipe away remaining dirt with a damp cloth. Avoid soaking the boots; excess water can lengthen drying time and affect some materials. Check the care instructions for your boot’s material before choosing a waterproofing product.

Let the boots dry completely before applying anything. Open the tongues and leave the boots in a well-ventilated spot at room temperature. Give them time. Direct heat from a radiator or hair dryer may dry some materials unevenly or damage them. Check hidden areas, such as the folds beneath the tongue, where moisture can linger. The surface may feel dry while the lining is still damp. Rushing this step is easy, but it can make treatment less effective.

Tips: Press a clean cloth against seams and inside the boot to check for dampness. If it picks up moisture, wait longer. Once the boots are fully dry, apply a product suitable for their material, following its directions. Test it on a small, less visible area first. No shortcuts.

Treat Uppers, Seams, and Stitching with a Material-Compatible Product

Waterproofing work boots starts with knowing what the uppers are made of. Smooth leather, suede, nubuck, and synthetic fabrics can react differently to waxes, creams, and sprays. Check the care instructions, then test the product on a small, hidden area. Let it dry and look for darkening, stiffness, or changes in texture. A small test matters.

Clean the boots with a soft brush and remove dust from the seams. Let them dry fully at room temperature; direct heat can dry out leather or weaken adhesives. Apply a material-compatible waterproofing product in thin, even layers. Pay close attention to stitch holes, tongue edges, and the seams around the toe and heel. Use a cloth or small applicator to work product into these areas without leaving thick buildup. Don’t soak the stitching.

Give the treatment time to cure according to its instructions before wearing the boots. Some products need more than one coat, but extra product does not always mean better protection. It can leave a sticky surface or affect breathability. Check the seams after wet shifts, since flexing and abrasion can wear treatment away. Waterproofing helps, but it cannot repair cracked leather or separated seams. A missed stitch line can still let water in.

Check for EN ISO 20345 “WR” Marking and Retest Water Resistance

How to Make Work Boots Waterproof

Check the boot label and product documents for the EN ISO 20345 “WR” marking. It indicates that the complete footwear passed a defined water-resistance test, not that it can stay submerged indefinitely. Confirm the marking applies to your exact model and check the standard edition listed in its documentation. Leather, seams, tongues, and worn-out soles can all affect performance over time. A coating may help maintain the upper, but it cannot restore damaged seams or replace certified testing.

Tips: Clean off dust and dried mud before applying care products. Let boots dry naturally, away from heaters. Use only treatments suitable for the boot’s materials, and follow its care instructions. Test a product on a small, hidden area first. Easy to overlook.

Retest periodically, especially after heavy use or visible wear. At home, check dry boots in a shallow splash of water, then inspect the lining for damp spots. Avoid prolonged soaking; this simple check does not reproduce the EN ISO test. If water gets inside, note where it entered and inspect seams, eyelets, and the sole bond. For certification-level confirmation, use a qualified testing facility. I would not rely on one quick field check alone: a boot may pass today and leak after another season of flexing.

How to Make Work Boots Waterproof — Check for EN ISO 20345 “WR” Marking and Retest Water Resistance

Check or step How to do it What to look for Next action
Find the WR marking Check the boot label, packaging, user instructions, or product declaration for “WR” and the applicable EN ISO 20345 edition. WR identifies footwear that has met the standard’s water-resistance requirements for the whole footwear construction. It is a performance classification, not a promise that boots will stay dry in every condition. If the marking or documentation is unclear, ask the supplier or manufacturer to confirm the exact model and standard edition.
Distinguish WR from upper-water markings Read the complete marking rather than relying on words such as “water-resistant” in a product description. WR concerns water resistance of the footwear as a whole. WPA, used in EN ISO 20345:2022, concerns water penetration and absorption of the upper; older footwear may use WRU for an upper-related requirement. Do not treat an upper-only marking as equivalent to the whole-footwear WR marking.
Inspect before treatment Clean off mud and grit, let the boots dry naturally, and inspect seams, stitching, tongue, eyelets, sole joins, and the upper for damage. Cracks, loose seams, punctures, damaged membranes, or separated soles can allow water in, even if the boots were originally marked WR. Follow the care instructions. Have damaged safety footwear assessed or replaced; do not assume a coating can repair structural damage.
Apply compatible care products Use only cleaning, conditioning, or water-repellent products permitted by the boot-care instructions and suitable for the upper material. Some treatments are intended for leather, while others are designed for textile or coated materials. An unsuitable product may affect the material or its finish. Test a product as directed. A treatment may help maintain the surface but does not create or restore EN ISO 20345 WR certification.
Dry boots correctly Remove insoles if permitted, loosen the laces, and allow the boots to air-dry away from direct heat. High heat can damage leather, adhesives, or waterproof components. Dampness inside a boot can also come from perspiration rather than an external leak. Use the care method stated in the instructions, and make sure boots are fully dry before checking them again.
Do a simple field screening With clean, dry boots, place dry absorbent paper inside and expose the outside briefly to a controlled, shallow amount of water. Keep water below the opening and avoid soaking or pressure. Check for visible wet patches inside and inspect the paper after the screening. Water entering over the boot opening is not evidence of a sole or upper leak. Stop if water appears inside. This is an informal maintenance check only, not an EN ISO 20345 laboratory test or certification retest.
Retest after changes or signs of wear Repeat the field screening after cleaning or permitted care, and whenever dampness, visible damage, or a change in work conditions raises concern. Repeated moisture inside, a damaged upper, or a loose sole may indicate the boots no longer provide the protection needed for the task. Do not rely on a failed or inconclusive field check for safety decisions. Seek professional assessment or replace the boots as appropriate.
Use boots within their limits Check the product instructions and select footwear for the duration, depth, and type of water exposure in the workplace. Water can enter through the opening, and wear, damage, fit, and exposure conditions affect real-world performance. WR does not mean suitable for every immersion or exposure scenario. For demanding or prolonged water exposure, confirm suitability with the supplier and follow workplace risk assessments.

Important: A simple field screening cannot verify compliance with EN ISO 20345. Formal testing and certification must follow the applicable standard and be carried out through the appropriate conformity-assessment process.

FAQS

How do I choose a waterproofing treatment for work boots?

Check the tongue label and care instructions. Match the product to the boot’s outer material.

Can one treatment work on every boot panel?

Not always. A boot may combine leather, mesh, and a waterproof membrane. The toe is not the whole story.

Why should I clean boots before treating them?

Mud and grit can prevent even coverage. Remove the laces, brush the uppers and seams, then wipe away remaining dirt with a damp cloth.

How can I tell if my boots are dry enough?

Open the tongues and leave them at room temperature in a ventilated spot. Press a clean cloth against the seams and lining. If it picks up moisture, wait longer.

Should I test a product before applying it to the whole boot?

Yes. Apply a small amount to a hidden area, let it dry, then check for darkening or texture changes. A small test matters.

Where should I apply the treatment?

Use a thin, even layer on compatible uppers. Pay attention to stitch holes, tongue edges, and seams around the toe and heel.

Is applying more product better?

Not necessarily. Thick buildup may feel sticky or affect breathability. Follow the product directions and avoid soaking the material.

Can waterproofing fix leaking seams or cracked leather?

No. Treatment can wear away with flexing and abrasion, but it cannot repair damaged leather or separated seams. It is tempting to rush the checks; that step is easy to misjudge.

Conclusion

Learning how to make work boots waterproof starts with understanding that water resistance is separate from an ASTM F2413 toe-impact rating of 75 ft·lbf. Before choosing a treatment, identify whether the uppers are leather, suede, fabric, or a combination, since each material may require a different product. Clean away dirt and residue, then let the boots dry completely so the treatment can adhere evenly.

Apply a material-compatible waterproofing product to the uppers, seams, and stitching, following its directions and avoiding products that could damage the boot’s finish. Pay particular attention to seams, where water may seep through. After treatment, allow the boots to dry as directed and check their performance with a cautious water-resistance test. For additional guidance, look for an EN ISO 20345 “WR” marking, while remembering that regular inspection and retreatment may be needed over time.

Charlotte

Charlotte

Charlotte is a seasoned marketing professional with a deep understanding of the company's portfolio and a passion for elevating its presence in the market. With a keen eye for detail and a commitment to excellence, she ensures that our professional blog is regularly updated with insightful articles......